Important: You must submit your claim within 30 days of guest checkout.
Before You Start
Make sure you have:
- Photos of the damage (before and after, if possible)
- Original purchase receipts for damaged items
- Repair quotes (if applicable)
- Any communication with the guest about the damage
- Police report (if applicable for theft or malicious damage)
For in depth list read our evidence requirement page
Watch the video or read the step-by-step guide below.
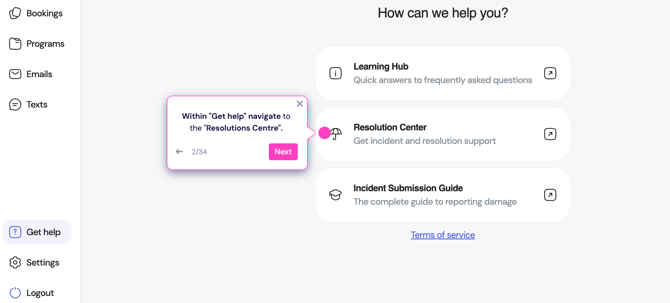
Step 1: Access the Resolutions Center
Log into your Truvi dashboard and navigate to Get Help. Select "How to Submit a Damage Claim" to begin the process.
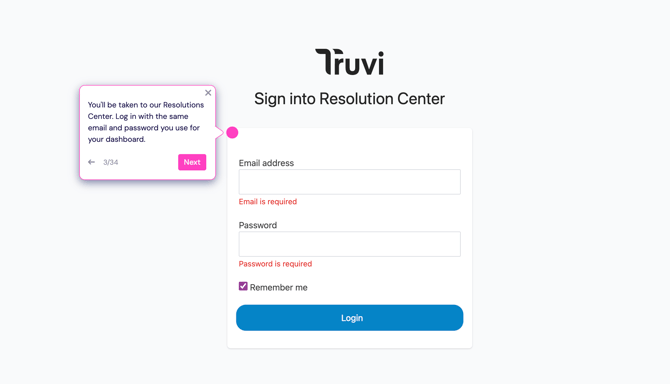
You'll be taken to the Resolutions Center login page. Use your dashboard login details to access it.
Step 2: Create a Report
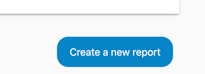
Go to the "Report Incident" tab and scroll down to "Choose the booking." You'll see all your bookings from the past 30 days—select the guest and listing where the damage occurred.
Note: The Time Left shows how many days you have left to submit your report.

After selecting the booking, click "Create a new report" at the bottom of the page.
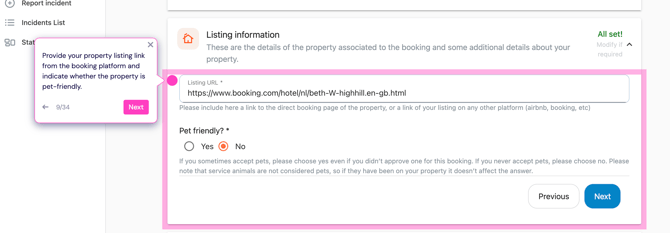
Step 3: Fill in Booking Details
You'll be asked to provide:
- The booking platform (Airbnb, Vrbo, etc.)
- Booking reference number from that platform
- Number of guests who stayed
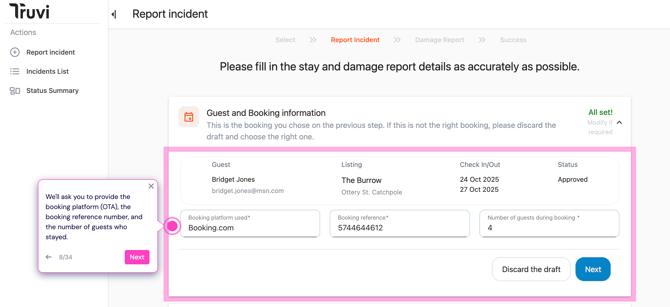
- Link to your property listing on the booking platform
- Whether the property is pet-friendly
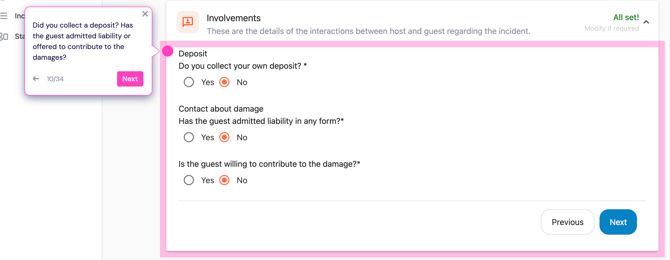
Step 4: Guest Interactions
Answer questions about your interaction with the guest:
- Did you collect a deposit? Yes/No
- Has the guest admitted liability? Yes/No
- Is the guest willing to contribute to damages? Yes/No
This information helps our team understand the full context of the incident.
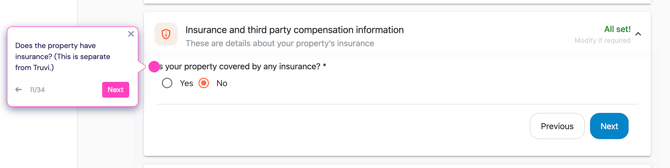
Step 5: Property Protection Information
Indicate whether you have separate property protection (not Truvi—your own policy). This helps us coordinate if multiple protection sources are involved.
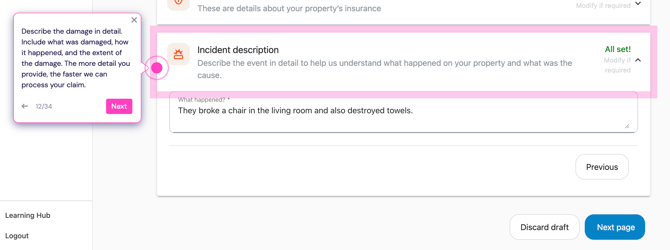
Step 6: Describe the Incident
Provide a detailed description of what happened. Include:
- What was damaged
- How it happened
- The extent of the damage
The more detail you provide, the faster we can process your claim.
Click Next to save your report and continue.
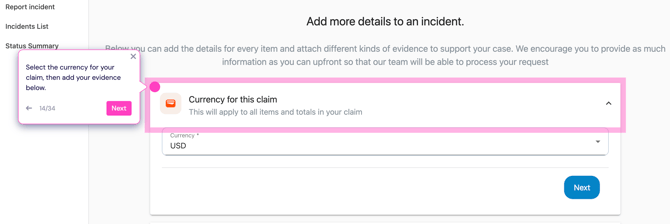
Step 7: Select Claim Currency
Choose the currency for your claim. This applies to all items and totals in your report.
Step 8: Add Damaged Item/s
For each damaged item, provide:
About the item
- Item name (e.g., "Living room chair")
- Original cost
Photos
- Upload before photos (if available)
- Upload after photos showing damage
- Multiple angles help—add as many as needed
- Timestamped photos speed up processing
Damage description Explain what happened to this specific item. Be detailed about the damage.

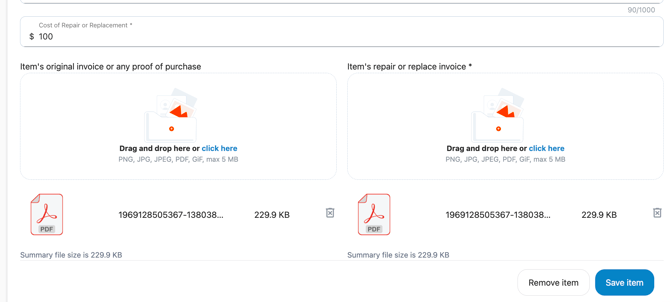
Step 9: Add Costs and Receipts
Cost of repair or replacement Enter the amount needed to repair or replace the item.
Original invoice Upload the original purchase receipt. If unavailable, provide:
- Photos of the item
- Bank statements showing purchase
- Links to similar items for sale online
Repair invoice (if applicable) Upload quotes from repair companies. We recommend getting two quotes from separate companies.
Click Save Item to add it to your claim.
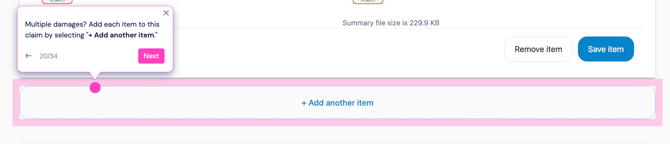
Step 10: Add Multiple Items (If Needed)
If multiple items were damaged, click "+ Add another item" and repeat the process for each one.
All added items appear in a list. Click any item to review or edit it.
Step 11: Upload Additional Evidence
Under "Evidence," upload any supporting documentation:
- Guest messages or apologies
- Additional property photos
- Videos of the damage
- Police reports
- Any other relevant documentation
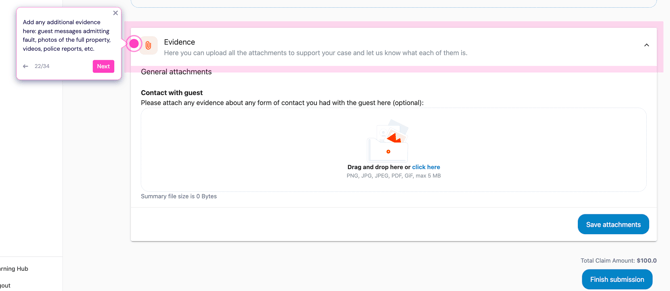
Note: Remember to save your attachments.
Step 12: Review and Submit
Before submitting:
- Review your total claim amount
- Verify all information is accurate
- Ensure all required evidence is uploaded
Then click "Finish Submission" when ready.

Important: Once submitted, you cannot edit your claim. Please double-check everything.
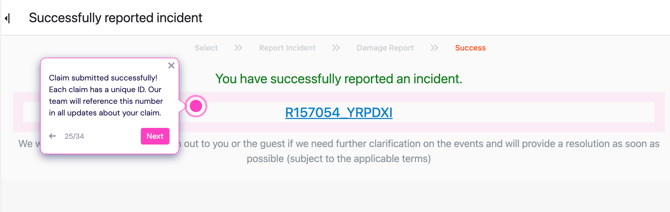
Step 13: Claim Submitted Successfully
Your claim has been submitted! You'll see your unique Claim ID.
Save this ID—our team will reference it in all communications about your claim.
Our team will review your claim within 3 business days.