
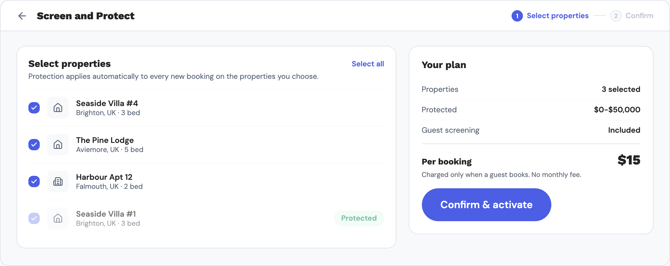
A prompt to switch Screen & Protect on. Whitelabel it however you like. One thing to flag: resolutions are handled directly by the Truvi team, who reach out to the customer, so that part sits outside your own flow.
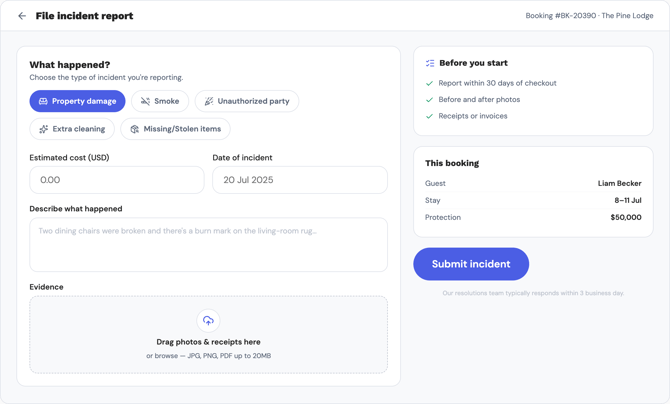
Screens that walk a customer through filing an incident report. Keep these easy to find and up to date. Reports have to be submitted within a set window after check-out, and each one needs supporting evidence like before-and-after photos and receipts. The clearer you make this, the fewer reports come in late or missing information, which keeps resolutions moving.
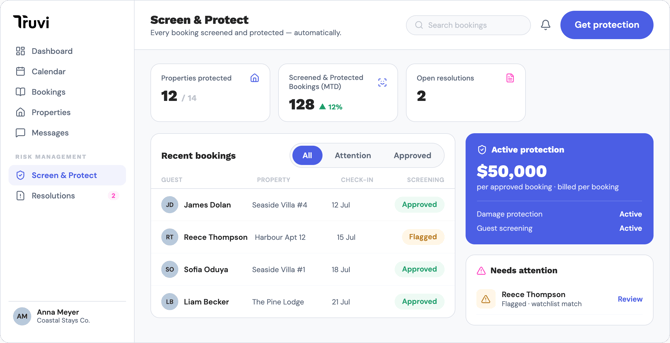
The main dashboard. This is where customers see everything at a glance: properties protected, screened and protected bookings, and any open resolutions. We'd strongly recommend keeping the screening status visible on the bookings list, as shown here, so customers can see which guests are approved or flagged in real time. The "needs attention" panel is a good way to surface flagged bookings, like a watchlist match, before check-in
📖 More resources:
➡️ Partner Guide: Screen & Protection API for Marketing and Sales
➡️ Partner Guide: Screen & Protect API – What's Protected?
➡️ Partner Guide: How the Screen & Protect API Claims Process Works
➡️ Partner Guide: Screen & Protect API Claims Submission Requirements & Customer Copy